
A great sleeping bag only does its job if you actually check it before you head out, not when you’re already zipped in at a windswept campsite, realiszing something’s off. A few quiet minutes of inspection at home can be the whole difference between a blissful night and a miserable one. That’s doubly true for gear you’ve had in storage for months or picked up secondhand. So before your next trip, run through this quick checklist to be sure your bag is genuinely ready for the road. Here’s exactly what to look at.
1. Check the Zipper and Seams
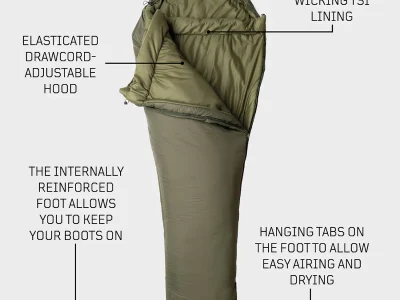
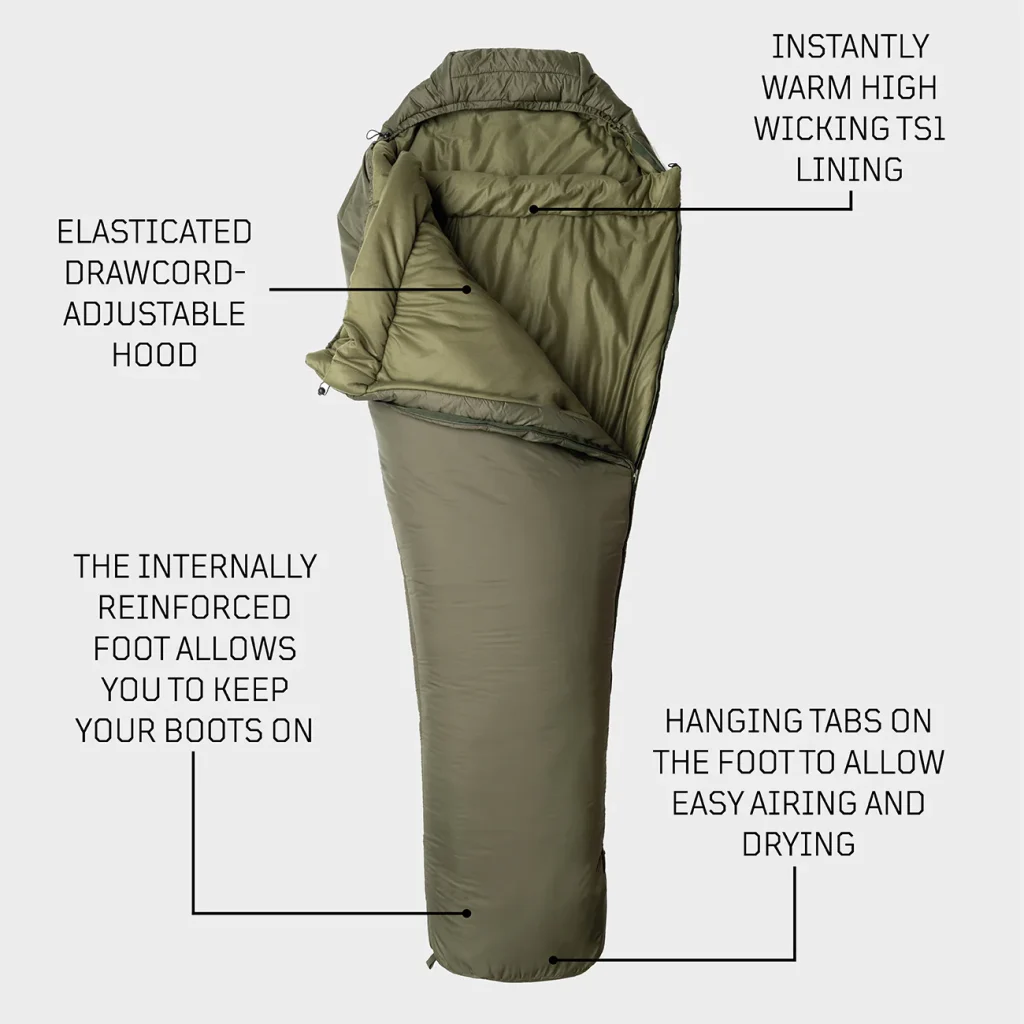
Before any trip, it’s worth checking the parts of your gear most likely to fail under stress. Run zippers open and closed a few times, inspect seams for loose stitching, and look for small tears or worn areas that could worsen in colder or wetter conditions. Even a reliable snugpak sleeping bag benefits from a quick inspection before heading out, since small issues tend to become much bigger problems once temperatures drop overnight.
Retailers like John Bull Clothing often recommend checking sleeping gear well before departure so there’s time to repair or replace damaged equipment if needed. Catching a faulty zipper or weakened seam early is usually far easier than dealing with it halfway through a cold night outdoors.
2. Check the Loft and Fill
Pull the bag fully out and give it time to fluff back up. Loft, how much it puffs back into shape, is exactly what traps the warm air keeping you cozy all night.
Watch for a few warning signs:
- Flat patches that won’t bounce back after a good shake
- Clumped or shifted fill bunched over to one side
- Damp or musty spots left behind by poor storage
If the bag simply won’t loft properly, its warmth rating means very little, no matter what the label proudly promises.
3. Check How It Was Stored
How a bag spent its off-season matters far more than most people think. A bag crammed tight in its stuff sack for months on end can lose its loft permanently.
Ideally it’s been kept loosely, in a big cotton sack or hung up in a cupboard, so the insulation stays springy and alive. If yours has been compressed since last summer, air it out and let it recover for a day or two before you trust it on a genuinely cold night. A quick sniff test for mildew while you’re at it never hurts, either.
4. Check the Temperature Rating
This is the check that actually keeps you safe, not just comfortable. Match the bag’s comfort rating to the lowest overnight temperature you realistically expect to face, then build in a little margin on top.
Cold is not a small thing to gamble with. The CDC has linked exposure to excessive natural cold to an average of roughly 1,300 deaths a year in the United States.
Pay attention to the comfort rating rather than the headline “extreme” figure, which only marks bare survival, not restful sleep. When you’re unsure, err toward a lower temperature rating, being slightly too warm is a far kinder problem than shivering until sunrise.
5. Check the Fit and Length
A bag that’s too short lets cold sneak in around your feet, while one that’s too roomy leaves dead air your body has to keep reheating. Neither does your sleep any favors.
Climb in at home and confirm you can lie comfortably with a little room to shift around, but not so much space that you’re basically swimming. If you’re on the taller side, double-check the length before you commit. Fit is one of those things you only notice once it’s wrong, usually right around 2 a.m.
6. Check Your Sleeping Surface
Your bag isn’t a solo act. A surprising amount of your body heat escapes straight down into the cold ground, and no amount of fill fully solves that on its own.
Pair it with a sleeping pad suited to the conditions:
- A foam or insulated pad for cold, hard ground
- The right R-value for proper winter trips
- A groundsheet to block creeping moisture
Test the whole combo together before you leave, because the bag and the pad really function as one connected system.
7. Check the Care Label
Finally, actually read the care instructions before you do anything drastic, like tossing the bag into a normal wash the night before you depart.
Different fills demand different handling, and the wrong cycle can quietly ruin the very insulation you’re relying on. Learn whether yours is machine-safe, how it should be dried, and roughly how long that takes. If it does need washing, do it well ahead of departure so it’s completely dry and fully lofted by the time you need it.
Conclusion
None of these checks take long, yet skipping them is precisely how good trips quietly go sideways. Inspect the zipper and seams, confirm the loft, match the rating to the real forecast, and pair the bag with a proper pad, do that, and it’ll perform exactly as intended. A little attention at the kitchen table beats a cold, sleepless night in the field every single time. Run the list, then go enjoy the trip.
This is a collaborative post.
 making paper clay with thread cuttings

Leave a Reply